Friday, December 21, 2007

Mouth-Watering Stuffed Mushrooms

Mouth-Watering Stuffed Mushrooms

SUBMITTED BY: Angie Zayac PHOTO BY: Grvqn

"These delicious mushrooms taste just like restaurant-style stuffed mushrooms and are my guy's absolute favorite."
PREP TIME 25 Min
COOK TIME 20 Min
READY IN 45 Min
SERVINGS & SCALING
Original recipe yield: 12 large mushrooms

INGREDIENTS

  • 12 whole fresh mushrooms
  • 1 tablespoon vegetable oil
  • 1 tablespoon minced garlic
  • 1 (8 ounce) package cream cheese, softened
  • 1/4 cup grated Parmesan cheese
  • 1/4 teaspoon ground black pepper
  • 1/4 teaspoon onion powder
  • 1/4 teaspoon ground cayenne pepper

DIRECTIONS

  1. Preheat oven to 350 degrees F (175 degrees C). Spray a baking sheet with cooking spray. Clean mushrooms with a damp paper towel. Carefully break off stems. Chop stems extremely fine, discarding tough end of stems.
  2. Heat oil in a large skillet over medium heat. Add garlic and chopped mushroom stems to the skillet. Fry until any moisture has disappeared, taking care not to burn garlic. Set aside to cool.
  3. When garlic and mushroom mixture is no longer hot, stir in cream cheese, Parmesan cheese, black pepper, onion powder and cayenne pepper. Mixture should be very thick. Using a little spoon, fill each mushroom cap with a generous amount of stuffing. Arrange the mushroom caps on prepared cookie sheet.
  4. Bake for 20 minutes in the preheated oven, or until the mushrooms are piping hot and liquid starts to form under caps.

Saturday, December 15, 2007

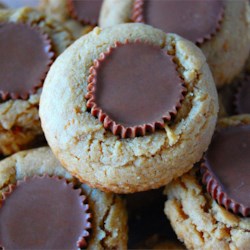
Peanut Butter Cup Cookies

Peanut Butter Cup Cookies

SUBMITTED BY: Nancy PHOTO BY: chibi chef

"These cookies have a sweet peanut butter cup center."
SERVINGS & SCALING Original recipe yield: 40 cookies

INGREDIENTS

  • 1 3/4 cups all-purpose flour
  • 1/2 teaspoon salt
  • 1 teaspoon baking soda
  • 1/2 cup butter, softened
  • 1/2 cup white sugar
  • 1/2 cup peanut butter
  • 1/2 cup packed brown sugar
  • 1 egg, beaten
  • 1 teaspoon vanilla extract
  • 2 tablespoons milk
  • 40 miniature chocolate covered peanut butter cups, unwrapped

DIRECTIONS

  1. Preheat oven to 375 degrees F (190 degrees C).
  2. Sift together the flour, salt and baking soda; set aside.
  3. Cream together the butter, sugar, peanut butter and brown sugar until fluffy. Beat in the egg, vanilla and milk. Add the flour mixture; mix well.
  4. Shape into 40 balls and place each into an ungreased mini muffin pan.
  5. Bake at 375 degrees for about 8 minutes. Remove from oven and immediately press a mini peanut butter cup into each ball. Cool and carefully remove from pan.

Sunday, December 9, 2007

Candy Making Tips


Candy Making Tips

By: Sydny Carter


Visions of Sugarplums

Candy is a year-round treat, but it is especially wonderful during the holidays. Making fudge at Christmas can quickly become a family tradition, with the whole family coming together to make this wonderfully simple confection. Candy can also be a great homemade gift for friends and family. After all, who would not want to receive a box of homemade chocolate truffles in their stocking? Although you can spend a lifetime learning everything there is to know about the confectioners' trade, there are plenty of easy to make recipes that will delight your friends and family. All you need to get started are a few common kitchen items, some simple ingredients, and a modicum of know-how.

Tools of the Trade

Most of the tools needed to make candy can be found in a well-stocked kitchen:

  • A medium-sized saucepan with a heavy bottom and straight sides is a must. It should be large enough to hold 3 to 4 times the volume of the ingredients; this will help prevent boil-overs.
  • A bowl, large enough to hold the saucepan, allows you to cool the candy while it is still in the pan. The temperature of the sugar mixture continues to rise even after it has been removed from the heat. Immersing the pan in cold water or an ice water bath stops the cooking at just the right time.
  • A long-handled wooden spoon.
  • A pastry brush reserved exclusively for candy-making. Some recipes will call for brushing down the sides of the pan with water to prevent crystallization.
  • A good candy thermometer. Although it is possible to make candy without one, a glass candy thermometer is invaluable to the beginner, and a useful tool for the professional. If possible, buy one equipped with a metal clamp that attaches to the side of the pan.
  • If you make candy on a more regular basis, you may want to invest in a marble slab and a copper caramel pan, but these are by no means necessary.

Only the Best

Sugar is the most basic ingredient in candy. Use an unopened package of sugar; this will ensure that there has been no contamination from other ingredients commonly found in the kitchen, such as flour or salt. Use unsalted butter; the salt content of salted butter can affect your final product. Never use margarine in a recipe that calls for butter: margarine has a higher water content, which will significantly affect the cooking time and results.


Hints and Tips

Before you turn on the stove, take the weather into account. On rainy or humid days, the cooking time can increase substantially or your candy may never set up at all. Sugar attracts water, so the humidity can adversely affect your recipe; wait for a clear, dry day.

Test your thermometer to make sure it is accurate. (You will need to do this every time you make candy.) Immerse it in a pan of water, and bring the water to a boil. The temperature should read 212 degrees F (100 degrees C). If it does not, you will need to adjust your recipe to reflect this. For example, if your thermometer reads 215 degrees F (102 degrees C) in boiling water, and the recipe requires that you cook the candy to 250 degrees F (121 degrees C), you will need to cook the mixture to 253 degrees F (123 degrees C).

Last, but not least, measure all your ingredients before you begin. It takes a long time to reach 220 degrees F (104 degrees C), but after that the temperature rises quickly. You will need to have everything within easy reach.


Sugar Cooking

Dissolve sugar into liquid ingredients over low heat, and then bring to a boil. Don't stir once the sugar has dissolved, unless directed to by the recipe. Either clamp the thermometer to the side of the pan, or periodically place it in the syrup to measure the temperature. The bulb of the thermometer should not touch the sides or bottom of the pan, or you'll get an inaccurate reading. Always clean the thermometer after each testing, and keep it by the stove in a glass of warm water. Cook until the desired temperature is reached. Immediately remove the pan from the heat, and cool the bottom of the pan in the bowl of ice water to stop the cooking. (For peanut brittle, pour the hot candy onto a greased baking sheet or oiled marble without cooling.)

If you don't have a candy thermometer, use the cold water method to test the candy. Drop a small amount of the mixture into a glass of cold water, and then examine it closely to determine if it's at thread stage, soft ball stage, hard ball stage, etc. Remove the pan from the heat while testing to avoid overcooking the candy. Use a fresh glass of water for each test.


Cooking On High

As with most cooking at high altitudes, there are modifications that need to be made to candy recipes. For every 500 feet above sea level, decrease the temperature by one degree. If you live at an altitude of 3500 feet and the recipe calls for cooking to 234 degrees F (112 degrees C), cook it to 227 degrees F (108 degrees C).

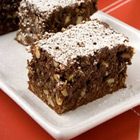
The Ultimate Brownie

The Ultimate Brownie

SUBMITTED BY: Carol PHOTO BY: Allrecipes

"Fudgy Brownies that are the best you have ever tried. Fattening but worth it!"

SERVINGS & SCALING Original recipe yield: 2 dozen brownies

INGREDIENTS

  • 1 1/2 cups unsalted butter
  • 3 cups white sugar
  • 2 teaspoons vanilla extract
  • 7 eggs
  • 1 1/4 cups all-purpose flour
  • 1 1/4 cups unsweetened cocoa powder
  • 1 teaspoon salt
  • 1 pound chopped walnuts

DIRECTIONS

  1. Preheat oven to 350 degrees F (175 degrees C). Line one 9x9 inch baking pan with foil and spray with cooking spray.
  2. In a saucepan over medium heat melt the butter. Stir in the sugar until dissolved. Remove mixture from heat and beat in the eggs one at a time mixing well after each addition. Stir in the vanilla.
  3. Sift the flour, cocoa and salt together. Add the flour mixture to the butter mixture, mixing until combined. Stir in the walnuts. Spread the batter into the prepared pan.
  4. Bake at 350 degrees F (175 degrees C) for 45 to 50 minutes. Do not overbake! These brownies freeze well so that you can enjoy them later.


Monday, December 3, 2007

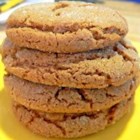
Crackle Top Molasses Cookies

Crackle Top Molasses Cookies

SUBMITTED BY: Laurie

"These cookies taste like gingersnaps."
SERVINGS & SCALING Original recipe yield: 4 dozen

INGREDIENTS

  • 2/3 cup vegetable oil
  • 1 cup white sugar
  • 1 egg
  • 1/4 cup molasses
  • 2 cups all-purpose flour
  • 2 teaspoons baking soda
  • 1 teaspoon ground cinnamon
  • 1 teaspoon ground ginger
  • 1/2 teaspoon ground cloves
  • 1/3 cup white sugar

DIRECTIONS

  1. Preheat oven to 350 degrees F (180 degrees C).
  2. In a large bowl mix oil and 1 cup of sugar. Add egg, beat well. Stir in molasses, 2 cups flour, baking soda and spices. If necessary, add more flour to make a firm dough.
  3. Shape dough into 1 1/4 inch balls. Roll in 1/3 cup sugar. Place 3 inches apart on an ungreased baking sheet. Bake 12 to 14 minutes or until tops crack. Remove from baking sheet and cool on rack.

Cheesy Chicken and Potato Casserole

Cheesy Chicken and Potato Casserole

SUBMITTED BY: Trish

"This spud's for you! It is a cheese, potato and chicken delight! You can make the same dish with pork chops - it's great."

SERVINGS & SCALING Original recipe yield: 8 servings


INGREDIENTS

  • 3 teaspoons vegetable oil
  • 3 skinless, boneless chicken breasts
  • 1 (5.5 ounce) package scalloped potato mix
  • 4 potatoes, thinly sliced
  • 2 cups shredded Cheddar cheese

DIRECTIONS

  1. Preheat oven to 350 degrees F (175 degrees C).
  2. Heat oil in a medium skillet over medium high heat. Add chicken breasts and saute until tender. Meanwhile, prepare potatoes according to package directions, adding 1 cup (instead of 2/3 cup) of milk and sliced potatoes. When chicken is tender, remove from heat, let cool and shred. Add shredded chicken to potato mixture.
  3. Fold chicken/potato mixture into a 9x13 inch baking dish. Cover and bake in the preheated oven for 25 to 35 minutes. Add cheese and bake for another 10 minutes.

Tuesday, October 9, 2007

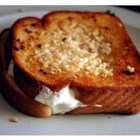
Italian Grilled Cheese Sandwiches

Italian Grilled Cheese Sandwiches

SUBMITTED BY: NYCDAVE PHOTO BY: bhague

"I came up with this recipe for my niece. I combined grilled cheese sandwiches with garlic bread. Its tasty, its quick and its the perfect appetizer for friends, family and unexpected guests. Use a firm white bread for best results."
PREP TIME 8 Min
COOK TIME 7 Min
READY IN 15 Min
SERVINGS & SCALING
Original recipe yield: 6 servings

INGREDIENTS

  • 1/4 cup unsalted butter
  • 1/8 teaspoon garlic powder (optional)
  • 12 slices white bread
  • 1 teaspoon dried oregano
  • 1 (8 ounce) package shredded mozzarella cheese
  • 1 (24 ounce) jar vodka marinara sauce

DIRECTIONS

  1. Preheat your oven's broiler.
  2. Place 6 slices of bread onto a baking sheet. Spread a small handful of the mozzarella cheese over each slice. Top with the remaining 6 slices of bread. Mix together the butter and garlic powder, brush some over the tops of the sandwiches, or spread with the back of a tablespoon. Sprinkle with dried oregano.
  3. Place baking sheet under the broiler for 2 to 3 minutes, until golden brown. Remove pan from oven, flip sandwiches, and brush the other sides with butter, and sprinkle with oregano. Return to the broiler, and cook until golden, about 2 minutes.
  4. Cut sandwiches in half diagonally, and serve immediately with vodka sauce on the side for dipping.

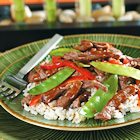
Asian Beef with Snow Peas

Asian Beef with Snow Peas

SUBMITTED BY: Holly

"Stir-fried beef in a light gingery sauce. Serve over steamed rice or hot egg noodles."

PREP TIME 5 Min
COOK TIME 10 Min
READY IN 15 Min
SERVINGS & SCALING
Original recipe yield: 4 servings

INGREDIENTS

  • 3 tablespoons soy sauce
  • 2 tablespoons rice wine
  • 1 tablespoon brown sugar
  • 1/2 teaspoon cornstarch
  • 1 tablespoon vegetable oil
  • 1 tablespoon minced fresh ginger root
  • 1 tablespoon minced garlic
  • 1 pound beef round steak, cut into thin strips
  • 8 ounces snow peas

DIRECTIONS

  1. In a small bowl, combine the soy sauce, rice wine, brown sugar and cornstarch. Set aside.
  2. Heat oil in a wok or skillet over medium high heat. Stir-fry ginger and garlic for 30 seconds. Add the steak and stir-fry for 2 minutes or until evenly browned. Add the snow peas and stir-fry for an additional 3 minutes. Add the soy sauce mixture, bring to a boil, stirring constantly. Lower heat and simmer until the sauce is thick and smooth. Serve immediately.

Monday, October 8, 2007

Spider Cupcakes

Spider Cupcakes


"These are a huge hit with kids!"

PREP TIME 1 Hr
COOK TIME 30 Min
READY IN 1 Hr 30 Min
SERVINGS & SCALING
Original recipe yield: 24 cupcakes


INGREDIENTS

  • 1 (18.25 ounce) package chocolate cake mix
  • 1 pound black shoestring licorice
  • 1 (16 ounce) can white frosting
  • 48 pieces candy corn
  • 48 cinnamon red hot candies
  • 1/4 cup orange decorator sugar

DIRECTIONS

  1. Prepare cupcakes according to package directions. Let cool completely.
  2. Cut licorice into 3 inch sections. Working with one or two cupcakes at a time, so the frosting doesn't set before decorating, frost the cupcakes with the white frosting. Insert licorice pieces into the outer edges of the cupcakes to make the legs of the spider, 3 legs on each side (4 takes up too much space). Place two pieces of candy corn on the front of the cupcake for fangs and use two red hots as eyes. Sprinkle with decorator sugar. Repeat with remaining cupcakes

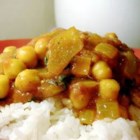
Chickpea Curry

Chickpea Curry


"We usually recommend preparing the beans at home, but using canned chickpeas allows for a fast, convenient dish."

PREP TIME 10 Min
COOK TIME 30 Min
READY IN 40 Min
SERVINGS & SCALING
Original recipe yield: 8 servings

INGREDIENTS

  • 2 tablespoons vegetable oil
  • 2 onions, minced
  • 2 cloves garlic, minced
  • 2 teaspoons fresh ginger root, finely chopped
  • 6 whole cloves
  • 2 (2 inch) sticks cinnamon, crushed
  • 1 teaspoon ground cumin
  • 1 teaspoon ground coriander
  • salt
  • 1 teaspoon cayenne pepper
  • 1 teaspoon ground turmeric
  • 2 (15 ounce) cans garbanzo beans
  • 1 cup chopped fresh cilantro

DIRECTIONS

  1. Heat oil in a large frying pan over medium heat, and fry onions until tender.
  2. Stir in garlic, ginger, cloves, cinnamon, cumin, coriander, salt, cayenne, and turmeric. Cook for 1 minute over medium heat, stirring constantly. Mix in garbanzo beans and their liquid. Continue to cook and stir until all ingredients are well blended and heated through. Remove from heat. Stir in cilantro just before serving, reserving 1 tablespoon for garnish.

Sunday, October 7, 2007

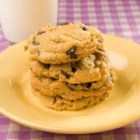
Outrageous Chocolate Chip Cookies

SUBMITTED BY: Joan

"A great combination of chocolate chips, oatmeal, and peanut butter."


PREP TIME 15 Min
COOK TIME 10 Min
READY IN 25 Min
SERVINGS & SCALING
Original recipe yield: 3 dozen


INGREDIENTS

  • 1/2 cup butter
  • 1/2 cup white sugar
  • 1/3 cup packed brown sugar
  • 1/2 cup peanut butter
  • 1/2 teaspoon vanilla extract
  • 1 egg
  • 1 cup all-purpose flour
  • 1 teaspoon baking soda
  • 1/4 teaspoon salt
  • 1/2 cup rolled oats
  • 1 cup semisweet chocolate chips

DIRECTIONS

  1. Preheat oven to 350 degrees F (175 degrees C).
  2. In a medium bowl, cream together the butter, white sugar and brown sugar until smooth. Stir in the peanut butter, vanilla and egg until well blended. Combine the flour, baking soda and salt; stir into the batter just until moistened. Mix in the oats and chocolate chips until evenly distributed. Drop by tablespoonfuls on to lightly greased cookie sheets.
  3. Bake for 10 to 12 minutes in the preheated oven, until the edges start to brown. Cool on cookie sheets for about 5 minutes before transferring to wire racks to cool completely.

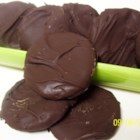
Thin Mint Crackers

SUBMITTED BY: Kim
"Just like the Girl Scout cookies!"
SERVINGS & SCALING Original recipe yield: 80 cookies

INGREDIENTS

  • 1 pound bittersweet chocolate
  • 80 buttery round crackers
  • 1/2 teaspoon peppermint extract

DIRECTIONS

  1. Using a double boiler method, melt the chocolate coatings over hot tap water for 15 - 20 minutes. Stir . Do not cook or get water into the chocolate.
  2. After it is melted, stir in a couple drops of peppermint flavor into the chocolate.
  3. Dip crackers into the melted chocolate and then place onto a cold cookie sheet and put into the refrigerator to set. (A freezing tray to rest the dipped cookies will keep the bottoms neat looking.)
  4. In a few minutes take them out and package in candy cups. The cookies are best kept at room temperature or a cool dry place away from any odors.

Saturday, January 27, 2007

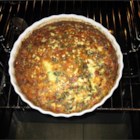
Easy Quiche

Easy Quiche

SUBMITTED BY: Michele Dodge
"This is an easy mix it up in one bowl and cook recipe. I make it for every brunch I attend. You may substitute chopped spinach for the broccoli if you wish."

Original recipe yield:
1 - 10 inch quiche

PREP TIME 10 Min
COOK TIME 50 Min
READY IN 1 Hr

INGREDIENTS

  • 2 cups milk
  • 4 eggs
  • 3/4 cup biscuit baking mix
  • 1/4 cup butter, softened
  • 1 cup grated Parmesan cheese
  • 1 (10 ounce) package chopped frozen broccoli, thawed and drained
  • 1 cup cubed cooked ham
  • 8 ounces shredded Cheddar cheese

DIRECTIONS

  1. Preheat oven to 375 degrees F (190 degrees C). Lightly grease a 10 inch quiche dish.
  2. In a large bowl, beat together milk, eggs, baking mix, butter and parmesan cheese. Batter will be lumpy. Stir in broccoli, ham and Cheddar cheese. Pour into prepared quiche dish.
  3. Bake in preheated oven for 50 minutes, until eggs are set and top is golden brown.

NUTRITION INFORMATION

Servings Per Recipe: 8

Amount Per Serving

Calories: 391

  • Total Fat: 27.4g
  • Cholesterol: 182mg
  • Sodium: 690mg
  • Total Carbs: 12.7g
  • Dietary Fiber: 1.3g
  • Protein: 23.8g

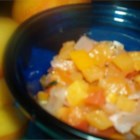
Nectarine Salsa

Nectarine Salsa

Stelly
"A refreshingly sweet and tangy blend. Especially good when cooked on the grill and served with a mild fish such as tilapia. If you are grilling fish, the salsa can be cooked on the grill at the same time and served over the fillets."

Original recipe yield:
2 servings

PREP TIME 10 Min
COOK TIME 10 Min
READY IN 25 Min

INGREDIENTS

  • 2 nectarines, pitted and chopped
  • 1/4 medium red onion, finely chopped
  • 1/4 cup balsamic vinegar
  • 1 teaspoon white sugar
  • 1/2 teaspoon dried cilantro
  • 1/2 teaspoon kosher salt
  • freshly ground black pepper to taste

DIRECTIONS

  1. In a bowl, mix the nectarines, onion, vinegar, sugar, cilantro, salt, and pepper. Allow to sit 5 minutes.
  2. In a skillet over medium heat, cook and stir the nectarine mixture 10 minutes, until onion and nectarines are tender and lightly browned.

NUTRITION INFORMATION

Servings Per Recipe: 2

Amount Per Serving

Calories: 101

  • Total Fat: 0.7g
  • Cholesterol: 0mg
  • Sodium: 479mg
  • Total Carbs: 24.3g
  • Dietary Fiber: 2.6g
  • Protein: 1.6g

Peanut Butter Temptations II

Peanut Butter Temptations II
SUBMITTED BY: Sally
"Peanut butter tarts with a chocolate covered peanut butter cup in the middle. You will need a mini muffin pan to make these."

Original recipe yield:
3 dozen


INGREDIENTS

  • 1/2 cup butter
  • 1/2 cup white sugar
  • 1/2 cup packed brown sugar
  • 1/2 cup peanut butter
  • 1 egg
  • 1/2 teaspoon vanilla extract
  • 1 1/4 cups all-purpose flour
  • 3/4 teaspoon baking soda
  • 1/2 teaspoon salt
  • 36 miniature chocolate covered peanut butter cups, unwrapped

DIRECTIONS

  1. Preheat oven to 375 degrees F (190 degrees C).
  2. In a medium bowl, cream together the brown sugar, white sugar and butter. Stir in the peanut butter, then the egg and vanilla. Sift together the flour, baking soda and salt, stir into the peanut butter mixture until the dough comes together. Shape into 1 inch balls and press them into the cups of an unprepared mini muffin pan.
  3. Bake for 8 to 10 minutes in the preheated oven. As soon as the cookies come out of the oven, press a mini chocolate covered peanut butter cup down into the center of each cookie until only the top is showing. Allow the cookies to cool completely before removing from their pans.

NUTRITION INFORMATION

Servings Per Recipe: 18

Amount Per Serving

Calories: 253

  • Total Fat: 14g
  • Cholesterol: 26mg
  • Sodium: 258mg
  • Total Carbs: 28.1g
  • Dietary Fiber: 1.2g
  • Protein: 4.7g

Thursday, January 25, 2007

Mocha Walnut Cookies

INGREDIENTS

  • 2 cups semisweet chocolate chips
  • 2 tablespoons instant coffee powder
  • 2 teaspoons boiling water
  • 1 1/4 cups all-purpose flour
  • 3/4 teaspoon baking soda
  • 1/2 teaspoon salt
  • 1/2 cup butter, softened
  • 1/2 cup white sugar
  • 1/2 cup packed brown sugar
  • 1 egg
  • 1/2 cup chopped nuts

DIRECTIONS

  1. Preheat oven to 350 degrees F (175 degrees C).
  2. Melt over hot (not boiling) water 1/2 cup of the chocolate morsels. Stir until smooth. Cool to room temperature.
  3. In small cup, dissolve the instant coffee in the 2 teaspoons boiling water. Set aside.
  4. In small bowl, combine flour, baking soda, and salt. Set aside.
  5. In large bowl, combine butter, sugars, and coffee. Beat until creamy. Add egg and melted morsels. Mix well. Gradually add flour mixture. Stir in remaining 1-1/2 cups chocolate morsels and walnuts. Form into walnut-sized balls and place on ungreased cookie sheets.
  6. Bake at 350 degrees F (175 degrees C) for 10-12 minutes. Allow to stand 2-3 minutes before removing from cookie sheets.

NUTRITION INFORMATION

Servings Per Recipe: 24

Amount Per Serving

Calories: 225

  • Total Fat: 11.5g
  • Cholesterol: 20mg
  • Sodium: 132mg
  • Total Carbs: 28.3g
  • Dietary Fiber: 0.7g
  • Protein: 2.5g

Mocha Walnut Cookies

SUBMITTED BY: Carmela Sagendorf
"A mocha version of the classic chocolate chip cookie. Originally submitted to ThanksgivingRecipe.com. "
Original recipe yield:
24 - 3 inch cookies

Chocolate Dipped Mocha Rounds

Chocolate Dipped Mocha Rounds

SUBMITTED BY: Laria Tabul
"Chocolate cookies dipped in chocolate!?! m-m-m-m-m-m-m"
Original recipe yield:
5 dozen

INGREDIENTS

  • 2 (1 ounce) squares unsweetened chocolate
  • 2 cups all-purpose flour
  • 1 teaspoon ground cinnamon
  • 1/4 teaspoon salt
  • 1/2 cup shortening
  • 1/2 cup butter
  • 1/2 cup white sugar
  • 1/2 cup packed brown sugar
  • 1 tablespoon instant coffee powder
  • 1 teaspoon water
  • 1 egg
  • 1 1/2 cups semisweet chocolate chips
  • 3 tablespoons shortening

DIRECTIONS

  1. Melt unsweetened chocolate squares in a heavy saucepan. Cool slightly.
  2. In a large bowl beat 1/2 cup shortening and butter or margarine with an electric mixer on medium speed until butter is softened. Add the sugar and brown sugar and beat until fluffy.
  3. Dissolve the instant coffee crystals in the water. Add the melted chocolate, egg and coffee to the butter mixture and beat well.
  4. Stir flour, cinnamon and salt together and add to the butter mixture. Cover and chill about 1 hour or until easy to handle.
  5. Shape into two 7-inch long rolls. Wrap in plastic wrap and chill for at least 6 hours or overnight.
  6. Preheat oven to 350 degrees F.
  7. Cut into 1/4-inch slices and place on an ungreased cookie sheet. Bake for 10-12 minutes. Remove to a wire rack and cool.
  8. Melt the semisweet chocolate pieces and 3 tablespoons of shortening over low heat. Dip on half of each cookie into the chocolate mixture. Place on waxed paper until the chocolate is set.

NUTRITION INFORMATION

Servings Per Recipe: 30

Amount Per Serving

Calories: 179

  • Total Fat: 11.6g
  • Cholesterol: 15mg
  • Sodium: 56mg
  • Total Carbs: 19.2g
  • Dietary Fiber: 1g
  • Protein: 1.7g

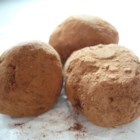
Easy Decadent Truffles


Easy Decadent Truffles

SUBMITTED BY: Jenny MacKinnell
"Insanely easy, but oh so rich! Recipe makes a large amount but you can vary flavorings and coatings to make several different varieties."
Original recipe yield:
5 dozen
PREP TIME 1 Hr
READY IN 1 Hr

INGREDIENTS

  • 1 (8 ounce) package cream cheese, softened
  • 3 cups confectioners' sugar, sifted
  • 3 cups semisweet chocolate chips, melted
  • 1 1/2 teaspoons vanilla

DIRECTIONS

  1. In a large bowl, beat cream cheese until smooth. Gradually beat in confectioners' sugar until well blended. Stir in melted chocolate and vanilla until no streaks remain. Refrigerate for about 1 hour. Shape into 1 inch balls.

Notes

Roll truffles in ground walnuts (or any ground nuts), cocoa, coconut, confectioners' sugar, candy sprinkles, etc.

To flavor truffles with liqueurs or other flavorings, omit vanilla. Divide truffle mixture into thirds. Add 1 tablespoon liqueur (almond, coffee, orange) to each mixture; mix well.

NUTRITION INFORMATION

Servings Per Recipe: 60

Amount Per Serving

Calories: 78

  • Total Fat: 3.8g
  • Cholesterol: 4mg
  • Sodium: 12mg
  • Total Carbs: 11.7g
  • Dietary Fiber: 0.5g
  • Protein: 0.6g

Thursday, January 18, 2007

Healthy Snacks for Kids


Healthy Snacks for Kids

By: Allrecipes Staff

Active kids with fast metabolisms and small-capacity tummies need a between-meal pick-me-up on a regular basis.

Snacks can, and should, be a part of every child's balanced diet. An afternoon snack will give kids more energy after school, and they'll be able to concentrate on homework, and have more energy to play outside rather than merely flop down in front of the television.

Let Them be Choosy
It's easy to equate snacking with junk food, but it doesn't have to be the case. The important thing is to provide kids with choices when it comes to snacking. If all the choices you give them are reasonably nutritious ones, then everybody's happy: your kids get to choose their snacks, and you get to ensure that they're eating healthfully.

Is it possible to make fruits, vegetables, lean protein, low fat dairy products and whole grains appealing to your kids? You've probably got a few tricks up your sleeve already to do just such a thing, but here are some of our favorite tried and true methods for making kids shout, 'hooray for healthy foods!'

Take a Dip
Kids love anything they can dip! A baggie full of carrot and celery sticks, cucumber and bell pepper slices, sugar snap peas and cherry tomatoes will disappear like magic if there's a tub of dip to go with them. Make some ranch dressing using low fat ingredients, or make a batch of nutritious hummus, bean dip or salsa. Baked tortilla chips and whole wheat crackers or pita triangles are perfect, nutritious and kid-pleasing accompaniments for dips, too. Sliced fruit takes on a whole new appeal as well when it's accompanied by a sweet, creamy dip. Good fruit dips include flavored yogurt, applesauce, low fat sour cream sweetened with honey or brown sugar, and caramel ice cream topping.

Be Constructive
Kids love to turn any eating occasion into an interactive experience. You may have a "don't play with your food" rule at mealtimes, but try relaxing the rule at snack time, and you'll become every kid's hero. By letting them construct their own snacks, you'll also keep them occupied for awhile and ensure that they're more likely to sample whatever nutritious foods they're tinkering with. And, by encouraging your child assemble his or her own snacks, you just may be sparking a lifelong interest in cooking!

  • A selection of melon balls, berries, pineapple chunks, and cubed peaches, pears or apples will be eagerly grabbed at by little hands and piled onto frilled toothpicks to make fruit kabobs.
  • Mini sandwiches made from crackers or cut-up bread will be a big hit. The kids will have a ball at snack time if you equip them with a few slices of bread, lunch meat and cheese, and a couple of miniature cookie cutters to make tiny, whimsically shaped sandwiches.
  • No kid can resist pizza! Pizza doesn't have to be loaded with fat--it can be a perfectly healthy snack. Depending on your kids' ages and appetites, they can use half an English muffin, a whole pita or a tortilla as a pizza crust. Let them smear on a bit of bottled tomato sauce, sprinkle it lightly with low fat mozzarella cheese, and top with chopped vegetables, and a little bit of lean meat if desired. Heat for a few minutes in the toaster oven or microwave, and then cut the pizza into teeny-tiny triangles for extra kid-appeal.


Freeze!
We usually equate frozen snacks with special treats, like ice cream and snow cones. Take advantage of that association and freeze some healthy treats for the kids to snack on. Try fruit, for starters! Frozen grapes are cool like popsicles and sweet like candy, but they've got plenty of vitamins and fiber too. The kids will really go bananas for frozen bananas when you roll them in chocolate syrup and chopped nuts. Don't forget to peel them before freezing! Other favorites include peach and nectarine slices, and berries of all kinds. If you're at home to help operate the blender, you can turn any combination of frozen fruit, milk, yogurt, juice and ice into highly nutritious but indulgently delicious "milkshake".

Substitute!
Even foods that are traditionally considered dessert items can become part of a healthy and well-balanced diet. Cookies and muffins made with applesauce in place of some of the fat, and with some additions like oats, dried fruit, nuts and whole wheat flour will be a snack you'll be glad to give them. Ice cream is a special treat but you can achieve the same cool, creamy deliciousness with low fat frozen yogurt, or pudding made with nonfat milk and frozen into pops. Empty calories abound in those packaged snack cakes that the kids beg you to buy, but you can find other ways to indulge a sweet tooth without doing too much nutritional damage: Any kid's eyes will light up when presented with a big, fluffy slice of angel food cake. Top it with fresh fruit to add some vitamins and fiber, or cut it into cubes for dipping in fruit-flavored yogurt for an extra dose of calcium.

Establish a Snacking Zone
It's a good idea to have a few things prepared in advance, whether you do it, the kids do it, or you all do it together. When hungry kids burst through the front door after school, they're going to want to grab whatever is easy and available; if it's easier to gobble down a few handfuls of chips than to take the time to peel and cut up fruit, that's probably what they're going to do. Designate one shelf of the refrigerator and/or pantry as the "snack shelf," with the understanding that anything that's on that shelf is okay to eat without having to ask permission first. Then, stock the shelf with several choices so the children won't complain about the snacks being "boring" and you won't need to worry about them overloading on junk. Make sure to include variety on the snack shelf--at least one thing from each food group.

Older kids may have extracurricular activities that keep them at school throughout the afternoon. Let them help you plan some carry-along snacks to sustain them through their sports matches and club meetings. Taking along homemade munchies will help them avoid the sugar and fat-laden temptation of the vending machine and the convenience store. Fruit, vegetable sticks, crackers, cheese, granola bars, healthy cookies and muffins, and peanut butter sandwiches are all high-energy foods that will hold up well in a locker until your hungry kid is ready for a homemade pick-me-up.
Budgeting 101

Budgeting 101

By: Maureen Callahan
Budgeting made easy.

Buying special software and workbooks can help you budget for everything from groceries to entertainment, but these five strategies will let you do-it-yourself for free.


  1. Make a running list of what you spend for one month. Include these categories: food, gas, mortgage/rent, utilities, miscellaneous (entertainment, dinners out, clothing, personal care items, tuition.) Save receipts. Write down every single penny you spend.
  2. Document all annual expenses. Auto insurance, home insurance, medical costs (prescriptions, doctor visits, health insurance), planned vacations, and savings. Divide these expenses by twelve. This is the amount you will need to set aside monthly for annual items.
  3. Set up a basic budget worksheet. At the top of the page list monthly spendable income; that’s your gross income minus taxes and automatic payroll deductions. Underneath, line by line, list each monthly expense from steps one and two. Next, add up monthly expenses and subtract them from your spendable income. If there’s a surplus, good. Tuck it away in savings. If the balance is negative, look back to your running list and figure out where to make cuts. Three good places to cut: the food budget, annual items (travel) or the miscellaneous category.
  4. Put aside money every month for savings and emergencies. If you’re paid weekly or bi-weekly stash the extra checks (it will be either two or four each year) into savings. If you’re paid monthly, allot money to savings using your budget worksheet.
  5. Revise your worksheet. Expenses change and so do spending habits. Refer to your budget worksheet frequently to see where you can pinch more pennies, particularly at the supermarket. If necessary, repeat step one periodically so that you don’t lose track of where your money goes.

More Supermarket Savings Tricks

  • Double up on coupons. It’s perfectly legal to use a store coupon and a manufacturer’s coupon at the same time.
  • Leave brand loyalty at the door. You’ll net better savings with store brands or sale items. One exception: buy name brands when they’re on sale for less than store brands.
  • Buy fruits and veggies when they’re in season. Not only does local produce taste better, but it’s usually much cheaper than items shipped from other parts of the world.
  • Take a quick inventory of your cart before hitting the check out. Remove impulse items. Do you really need that giant bag of chips? The candy? It’s easy to pick up items you want (but don’t really need) as you wander store aisles.
  • Pay attention to prices of items you routinely buy in every store you frequent. Keep a mental tab (or write it down) so you’ll know who has the best prices.
  • Bring sale circulars from other stores to a supermarket that matches sale prices. That way you can do all your shopping in one place yet net all the best prices.

Gypsy Soup

Gypsy Soup

SUBMITTED BY: BINGADING
"This is a savory vegetable soup that permeates a wonderful aroma. Perfect for those brisk fall days. Serve with crusty bread. For a vegetarian soup, substitute vegetable broth for the chicken broth."

Original recipe yield:
10 servings
PREP TIME 30 Min
COOK TIME 30 Min
READY IN 1 Hr

INGREDIENTS

  • 4 tablespoons olive oil
  • 2 cups chopped onion
  • 1/2 cup chopped celery
  • 2 cloves garlic, crushed
  • 2 cups diced peeled sweet potatoes
  • 2 teaspoons paprika
  • 1 teaspoon ground turmeric
  • 1 teaspoon dried basil
  • 1 teaspoon salt
  • 1 pinch ground cinnamon
  • 1 pinch cayenne pepper
  • 1 bay leaf
  • 3 cups chicken stock
  • 1 tablespoon tamari
  • 1 cup chopped fresh tomato
  • 1 1/2 cups cooked garbanzo beans
  • 3/4 cup chopped green bell pepper

DIRECTIONS

  1. Heat olive oil in a stock pot over medium-high heat. Saute onion, garlic, celery and sweet potatoes for about 5 minutes, or until onion is soft. Season with paprika, turmeric, basil, salt, cinnamon, cayenne, and bay leaf. Stir to blend, then stir in chicken stock and tamari. Cover, and simmer over low heat for 15 minutes.
  2. Add tomatoes, garbanzo beans and green pepper to the soup, and simmer for another 10 minutes, or until all of the vegetables are tender. Adjust salt and pepper to taste.

NUTRITION INFORMATION

Servings Per Recipe: 10

Amount Per Serving

Calories: 143

  • Total Fat: 6.3g
  • Cholesterol: <>
  • Sodium: 658mg
  • Total Carbs: 19.5g
  • Dietary Fiber: 3.6g
  • Protein: 3.3g

Monday, January 8, 2007

Cherry Tomato Salad

Cherry Tomato Salad

SUBMITTED BY: Keren

"This recipe was passed on by a friend and has been passed on to many more friends. It is a colorful and delicious salad served in a self made vinaigrette. Always an excellent choice when entertaining for dinner."

Original recipe yield:
6 servings
PREP TIME 15 Min
COOK TIME 5 Min
READY IN 1 Hr 20 Min

INGREDIENTS

  • 40 cherry tomatoes, halved
  • 1 cup pitted and sliced green olives
  • 1 (6 ounce) can black olives, drained and sliced
  • 2 green onions, minced
  • 3 ounces pine nuts
  • 1/2 cup olive oil
  • 2 tablespoons red wine vinegar
  • 1 tablespoon white sugar
  • 1 teaspoon dried oregano
  • salt and pepper to taste

DIRECTIONS

  1. In a big bowl, combine cherry tomatoes, green olives, back olives, and spring onion.
  2. In a dry skillet, toast pine nuts over medium heat until golden brown, turning frequently. Stir into tomato mixture.
  3. In a small bowl, mix together olive oil, red wine vinegar, sugar, and oregano. Season to taste with salt and pepper. Pour over salad, and gently stir to coat. Chill for 1 hour.

NUTRITION INFORMATION

Servings Per Recipe: 6

Amount Per Serving

Calories: 341

  • Total Fat: 32.2g
  • Cholesterol: 0mg
  • Sodium: 940mg
  • Total Carbs: 12.6g
  • Dietary Fiber: 3.3g
  • Protein: 5.1g

Sunday, January 7, 2007

Fuzzy's Chipotle Flank Steak

Fuzzy's Chipotle Flank Steak

SUBMITTED BY: ERIEH2O
"A surprisingly tasty grilled steak made with ease. A potent Chipotle paste makes this a very spicy steak, not for the faint of heart!"
Original recipe yield:
6 servings
PREP TIME 5 Min
COOK TIME 10 Min
READY IN 8 Hrs 15 Min

INGREDIENTS

  • 2 tablespoons olive oil
  • 2 (7 ounce) cans chipotle peppers
  • 2 pounds flank steak

DIRECTIONS

  1. Puree olive oil and chipotle peppers in a blender until smooth. Spread over flank steak, and marinate in the refrigerator overnight.
  2. Preheat a grill for medium-high heat.
  3. Grill the flank steak to desired doneness, about five minutes per side for medium.

Note

The chipotle puree will become crusty and begin to burn as you grill the steak. The trick is to get the heat just right so that the beef is ready just as the chipotle begins to singe.


NUTRITION INFORMATION

Servings Per Recipe: 6

Amount Per Serving

Calories: 221

  • Total Fat: 13.8g
  • Cholesterol: 45mg
  • Sodium: 349mg
  • Total Carbs: 4.2g
  • Dietary Fiber: 2.1g
  • Protein: 17.5g

Banana Crepes

Banana Crepes
SUBMITTED BY: Jessica Eymann
"French crepes filled with a sweet cream sauce over bananas and topped with whipped cream."
Original recipe yield:
6 servings
PREP TIME 5 Min
COOK TIME 15 Min
READY IN 20 Min

INGREDIENTS

  • 1 cup all-purpose flour
  • 1/4 cup confectioners' sugar
  • 2 eggs
  • 1 cup milk
  • 3 tablespoons butter, melted
  • 1 teaspoon vanilla extract
  • 1/4 teaspoon salt
  • 1/4 cup butter
  • 1/4 cup packed brown sugar
  • 1/4 teaspoon ground cinnamon
  • 1/4 teaspoon ground nutmeg
  • 1/4 cup half-and-half cream
  • 6 bananas, halved lengthwise
  • 1 1/2 cups whipped heavy cream
  • 1 pinch ground cinnamon

DIRECTIONS

  1. Sift flour and powdered sugar into a mixing bowl. Add eggs, milk, butter, vanilla, and salt; beat until smooth.
  2. Heat a lightly greased 6 inch skillet. Add about 3 tablespoons batter. Tilt skillet so that batter spreads to almost cover the bottom of skillet. Cook until lightly browned; turn and brown the other side. Repeat process with remaining batter, grease skillet as needed.
  3. Melt 1/4 cup butter in a large skillet. Stir in brown sugar, 1/4 teaspoon cinnamon and nutmeg. Stir in cream and cook until slightly thickened. Add half the bananas at a time to skillet; cook for 2 to 3 minutes, spooning sauce over them. Remove from heat.
  4. Roll a crepe around each banana half and place on serving platter. Spoon sauce over crepes. Top with whipped cream and a pinch of cinnamon.

NUTRITION INFORMATION

Servings Per Recipe: 6

Amount Per Serving

Calories: 523

  • Total Fat: 28.9g
  • Cholesterol: 155mg
  • Sodium: 296mg
  • Total Carbs: 61.5g
  • Dietary Fiber: 3.6g
  • Protein: 7.9g