Showing posts with label Usefull. Show all posts

Sunday, December 9, 2007

Candy Making Tips


Candy Making Tips

By: Sydny Carter


Visions of Sugarplums

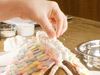
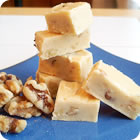
Candy is a year-round treat, but it is especially wonderful during the holidays. Making fudge at Christmas can quickly become a family tradition, with the whole family coming together to make this wonderfully simple confection. Candy can also be a great homemade gift for friends and family. After all, who would not want to receive a box of homemade chocolate truffles in their stocking? Although you can spend a lifetime learning everything there is to know about the confectioners' trade, there are plenty of easy to make recipes that will delight your friends and family. All you need to get started are a few common kitchen items, some simple ingredients, and a modicum of know-how.

Tools of the Trade

Most of the tools needed to make candy can be found in a well-stocked kitchen:

  • A medium-sized saucepan with a heavy bottom and straight sides is a must. It should be large enough to hold 3 to 4 times the volume of the ingredients; this will help prevent boil-overs.
  • A bowl, large enough to hold the saucepan, allows you to cool the candy while it is still in the pan. The temperature of the sugar mixture continues to rise even after it has been removed from the heat. Immersing the pan in cold water or an ice water bath stops the cooking at just the right time.
  • A long-handled wooden spoon.
  • A pastry brush reserved exclusively for candy-making. Some recipes will call for brushing down the sides of the pan with water to prevent crystallization.
  • A good candy thermometer. Although it is possible to make candy without one, a glass candy thermometer is invaluable to the beginner, and a useful tool for the professional. If possible, buy one equipped with a metal clamp that attaches to the side of the pan.
  • If you make candy on a more regular basis, you may want to invest in a marble slab and a copper caramel pan, but these are by no means necessary.

Only the Best

Sugar is the most basic ingredient in candy. Use an unopened package of sugar; this will ensure that there has been no contamination from other ingredients commonly found in the kitchen, such as flour or salt. Use unsalted butter; the salt content of salted butter can affect your final product. Never use margarine in a recipe that calls for butter: margarine has a higher water content, which will significantly affect the cooking time and results.


Hints and Tips

Before you turn on the stove, take the weather into account. On rainy or humid days, the cooking time can increase substantially or your candy may never set up at all. Sugar attracts water, so the humidity can adversely affect your recipe; wait for a clear, dry day.

Test your thermometer to make sure it is accurate. (You will need to do this every time you make candy.) Immerse it in a pan of water, and bring the water to a boil. The temperature should read 212 degrees F (100 degrees C). If it does not, you will need to adjust your recipe to reflect this. For example, if your thermometer reads 215 degrees F (102 degrees C) in boiling water, and the recipe requires that you cook the candy to 250 degrees F (121 degrees C), you will need to cook the mixture to 253 degrees F (123 degrees C).

Last, but not least, measure all your ingredients before you begin. It takes a long time to reach 220 degrees F (104 degrees C), but after that the temperature rises quickly. You will need to have everything within easy reach.


Sugar Cooking

Dissolve sugar into liquid ingredients over low heat, and then bring to a boil. Don't stir once the sugar has dissolved, unless directed to by the recipe. Either clamp the thermometer to the side of the pan, or periodically place it in the syrup to measure the temperature. The bulb of the thermometer should not touch the sides or bottom of the pan, or you'll get an inaccurate reading. Always clean the thermometer after each testing, and keep it by the stove in a glass of warm water. Cook until the desired temperature is reached. Immediately remove the pan from the heat, and cool the bottom of the pan in the bowl of ice water to stop the cooking. (For peanut brittle, pour the hot candy onto a greased baking sheet or oiled marble without cooling.)

If you don't have a candy thermometer, use the cold water method to test the candy. Drop a small amount of the mixture into a glass of cold water, and then examine it closely to determine if it's at thread stage, soft ball stage, hard ball stage, etc. Remove the pan from the heat while testing to avoid overcooking the candy. Use a fresh glass of water for each test.


Cooking On High

As with most cooking at high altitudes, there are modifications that need to be made to candy recipes. For every 500 feet above sea level, decrease the temperature by one degree. If you live at an altitude of 3500 feet and the recipe calls for cooking to 234 degrees F (112 degrees C), cook it to 227 degrees F (108 degrees C).

Monday, December 3, 2007

Crackle Top Molasses Cookies

Crackle Top Molasses Cookies

SUBMITTED BY: Laurie

"These cookies taste like gingersnaps."
SERVINGS & SCALING Original recipe yield: 4 dozen

INGREDIENTS

  • 2/3 cup vegetable oil
  • 1 cup white sugar
  • 1 egg
  • 1/4 cup molasses
  • 2 cups all-purpose flour
  • 2 teaspoons baking soda
  • 1 teaspoon ground cinnamon
  • 1 teaspoon ground ginger
  • 1/2 teaspoon ground cloves
  • 1/3 cup white sugar

DIRECTIONS

  1. Preheat oven to 350 degrees F (180 degrees C).
  2. In a large bowl mix oil and 1 cup of sugar. Add egg, beat well. Stir in molasses, 2 cups flour, baking soda and spices. If necessary, add more flour to make a firm dough.
  3. Shape dough into 1 1/4 inch balls. Roll in 1/3 cup sugar. Place 3 inches apart on an ungreased baking sheet. Bake 12 to 14 minutes or until tops crack. Remove from baking sheet and cool on rack.

Sunday, October 7, 2007

Outrageous Chocolate Chip Cookies

SUBMITTED BY: Joan

"A great combination of chocolate chips, oatmeal, and peanut butter."


PREP TIME 15 Min
COOK TIME 10 Min
READY IN 25 Min
SERVINGS & SCALING
Original recipe yield: 3 dozen


INGREDIENTS

  • 1/2 cup butter
  • 1/2 cup white sugar
  • 1/3 cup packed brown sugar
  • 1/2 cup peanut butter
  • 1/2 teaspoon vanilla extract
  • 1 egg
  • 1 cup all-purpose flour
  • 1 teaspoon baking soda
  • 1/4 teaspoon salt
  • 1/2 cup rolled oats
  • 1 cup semisweet chocolate chips

DIRECTIONS

  1. Preheat oven to 350 degrees F (175 degrees C).
  2. In a medium bowl, cream together the butter, white sugar and brown sugar until smooth. Stir in the peanut butter, vanilla and egg until well blended. Combine the flour, baking soda and salt; stir into the batter just until moistened. Mix in the oats and chocolate chips until evenly distributed. Drop by tablespoonfuls on to lightly greased cookie sheets.
  3. Bake for 10 to 12 minutes in the preheated oven, until the edges start to brown. Cool on cookie sheets for about 5 minutes before transferring to wire racks to cool completely.

Thursday, January 18, 2007

Healthy Snacks for Kids


Healthy Snacks for Kids

By: Allrecipes Staff

Active kids with fast metabolisms and small-capacity tummies need a between-meal pick-me-up on a regular basis.

Snacks can, and should, be a part of every child's balanced diet. An afternoon snack will give kids more energy after school, and they'll be able to concentrate on homework, and have more energy to play outside rather than merely flop down in front of the television.

Let Them be Choosy
It's easy to equate snacking with junk food, but it doesn't have to be the case. The important thing is to provide kids with choices when it comes to snacking. If all the choices you give them are reasonably nutritious ones, then everybody's happy: your kids get to choose their snacks, and you get to ensure that they're eating healthfully.

Is it possible to make fruits, vegetables, lean protein, low fat dairy products and whole grains appealing to your kids? You've probably got a few tricks up your sleeve already to do just such a thing, but here are some of our favorite tried and true methods for making kids shout, 'hooray for healthy foods!'

Take a Dip
Kids love anything they can dip! A baggie full of carrot and celery sticks, cucumber and bell pepper slices, sugar snap peas and cherry tomatoes will disappear like magic if there's a tub of dip to go with them. Make some ranch dressing using low fat ingredients, or make a batch of nutritious hummus, bean dip or salsa. Baked tortilla chips and whole wheat crackers or pita triangles are perfect, nutritious and kid-pleasing accompaniments for dips, too. Sliced fruit takes on a whole new appeal as well when it's accompanied by a sweet, creamy dip. Good fruit dips include flavored yogurt, applesauce, low fat sour cream sweetened with honey or brown sugar, and caramel ice cream topping.

Be Constructive
Kids love to turn any eating occasion into an interactive experience. You may have a "don't play with your food" rule at mealtimes, but try relaxing the rule at snack time, and you'll become every kid's hero. By letting them construct their own snacks, you'll also keep them occupied for awhile and ensure that they're more likely to sample whatever nutritious foods they're tinkering with. And, by encouraging your child assemble his or her own snacks, you just may be sparking a lifelong interest in cooking!

  • A selection of melon balls, berries, pineapple chunks, and cubed peaches, pears or apples will be eagerly grabbed at by little hands and piled onto frilled toothpicks to make fruit kabobs.
  • Mini sandwiches made from crackers or cut-up bread will be a big hit. The kids will have a ball at snack time if you equip them with a few slices of bread, lunch meat and cheese, and a couple of miniature cookie cutters to make tiny, whimsically shaped sandwiches.
  • No kid can resist pizza! Pizza doesn't have to be loaded with fat--it can be a perfectly healthy snack. Depending on your kids' ages and appetites, they can use half an English muffin, a whole pita or a tortilla as a pizza crust. Let them smear on a bit of bottled tomato sauce, sprinkle it lightly with low fat mozzarella cheese, and top with chopped vegetables, and a little bit of lean meat if desired. Heat for a few minutes in the toaster oven or microwave, and then cut the pizza into teeny-tiny triangles for extra kid-appeal.


Freeze!
We usually equate frozen snacks with special treats, like ice cream and snow cones. Take advantage of that association and freeze some healthy treats for the kids to snack on. Try fruit, for starters! Frozen grapes are cool like popsicles and sweet like candy, but they've got plenty of vitamins and fiber too. The kids will really go bananas for frozen bananas when you roll them in chocolate syrup and chopped nuts. Don't forget to peel them before freezing! Other favorites include peach and nectarine slices, and berries of all kinds. If you're at home to help operate the blender, you can turn any combination of frozen fruit, milk, yogurt, juice and ice into highly nutritious but indulgently delicious "milkshake".

Substitute!
Even foods that are traditionally considered dessert items can become part of a healthy and well-balanced diet. Cookies and muffins made with applesauce in place of some of the fat, and with some additions like oats, dried fruit, nuts and whole wheat flour will be a snack you'll be glad to give them. Ice cream is a special treat but you can achieve the same cool, creamy deliciousness with low fat frozen yogurt, or pudding made with nonfat milk and frozen into pops. Empty calories abound in those packaged snack cakes that the kids beg you to buy, but you can find other ways to indulge a sweet tooth without doing too much nutritional damage: Any kid's eyes will light up when presented with a big, fluffy slice of angel food cake. Top it with fresh fruit to add some vitamins and fiber, or cut it into cubes for dipping in fruit-flavored yogurt for an extra dose of calcium.

Establish a Snacking Zone
It's a good idea to have a few things prepared in advance, whether you do it, the kids do it, or you all do it together. When hungry kids burst through the front door after school, they're going to want to grab whatever is easy and available; if it's easier to gobble down a few handfuls of chips than to take the time to peel and cut up fruit, that's probably what they're going to do. Designate one shelf of the refrigerator and/or pantry as the "snack shelf," with the understanding that anything that's on that shelf is okay to eat without having to ask permission first. Then, stock the shelf with several choices so the children won't complain about the snacks being "boring" and you won't need to worry about them overloading on junk. Make sure to include variety on the snack shelf--at least one thing from each food group.

Older kids may have extracurricular activities that keep them at school throughout the afternoon. Let them help you plan some carry-along snacks to sustain them through their sports matches and club meetings. Taking along homemade munchies will help them avoid the sugar and fat-laden temptation of the vending machine and the convenience store. Fruit, vegetable sticks, crackers, cheese, granola bars, healthy cookies and muffins, and peanut butter sandwiches are all high-energy foods that will hold up well in a locker until your hungry kid is ready for a homemade pick-me-up.

Tuesday, December 19, 2006

Gingerbread Houses Advice

As Hansel and Gretel discovered, a gingerbread house is irresistible. It makes an impressive holiday centerpiece and is an enchanting activity for kids of all ages.

With our tested recipes, easy-to-follow template and decorating suggestions, it’s not so difficult--just gather your supplies, get creative and have some fun!

Nibble, nibble little mouse...Who is nibbling at my house?

Planning and Building

Here are supplies you'll need:

    • The pattern
    • Gingerbread dough: double the recipe
    • Rolling pin
    • Cookie sheets
    • Aluminum foil
    • Plywood base or heavy cardboard, doubled to support the house
    • Royal icing, recipe doubled
    • Pastry bags and decorating tips
    • Butter knife, palette knife or flat sandwich spreader
    • A damp cloth for quick clean-ups
    • Glue gun (optional)

Helpful tips:

  • Allow a weekend to complete the house
  • Have all supplies ready
  • Read all instructions before you begin: you will need to double the gingerbread recipe to have enough dough
  • Allow the gingerbread to cool thoroughly before assembling
  • Make icing ahead of time
  • Keep icing covered with a clean damp cloth (touching icing) and plastic wrap at all times to prevent it from drying out
  • Adjust the consistency of the icing by adding more egg whites if the icing is too dry or more powdered sugar if it is too wet. It should be thick and stiff.
  • Prepare the base for your house by covering plywood or heavy cardboard with several layers of foil
  • Use canned goods from the pantry to stabilize the walls during assembly; remove them before adding the roof


The house that Jack built

  • Visualize the "yard." Will you have a walkway? Trees? A fence? Set the house at an angle for a pleasing presentation.
  • When assembling, apply a generous amount of icing to one side of the joint and press an un-iced side to the edge and hold until set. (See step-by-step articles for more photos.)
  • Apply icing-glue to the bottom of your pieces for more stability; adhere them to the foil/plywood base.
  • Allow 30 minutes for the front, side walls and back of house to dry and firmly set before adding the roof.
  • You’ll need an extra pair of hands when adding and securing the roof.
    Allow house to dry completely before decorating: a minimum of 4 hours, preferably overnight.


Problems?

  • Don't worry; you'll be able to fill gaps and cover errors later with more icing and decorations.
  • A fool-proof assembly method, if you're not going to eat the gingerbread, is to use a glue gun. Use icing to finish the look.
  • Icing can be kept at room temperature overnight. Be sure it is well-covered with a damp cloth and plastic wrap.

Decorating

This is the fun part! The decorations you choose are limited only by your imagination.

You’ll need:

    • Royal icing
    • Pastry bags and tips
    • Cookie sheets
    • Assorted candy (see step-by-step Gingerbread House articles)
    • Butter knife or flat sandwich spreader
    • Tweezers
    • Knife
    • Super glue (for adult use only; do not use if you will be eating the gingerbread house or candy)


Helpful tips

  • Have a plan for decorating. Think about how you want your house to look and what candy should go where.
  • Have candy and decorating supplies ready.
  • Save time and make accessory items ahead of time: snowmen, trees, carts, candles and

    fences can be made while you’re waiting for the house to dry.
  • Apply candy decorations by putting a small dab of icing to the underside of the candy and hold it in place until set.
  • Use extra dough scraps for decorative cut-outs.
  • Keep the tip of your pastry bag covered with a damp cloth in between decorating to prevent hardening.
  • Use tweezers to adhere small items to the house.
  • You may need super glue to adhere top-heavy items, like lamp posts.

    Storage

    Help your house survive the nibbles of your children!

    • Moisture is a decorated cookie’s worst enemy: display the house in a cool dry place.
    • Cover at night to seal out moisture and dust; lightly drape a clean trash bag over the house and base.
    • Gingerbread houses can last up to a year, if you choose not to eat them. Spray with a clear lacquer for maximum protection.
    • Cover with a plastic bag and store in a box with some Styrofoam “peanuts” to protect house from damage.

Tips for your cooking.

Rolling and Cutting

You will find cookie dough much easier to work with after it's been refrigerated for at least half an hour. Keep cookie cutters from sticking to the dough by misting them very lightly with cooking spray. If you're cutting out delicate or large shapes, save them from falling apart by rolling out the dough on parchment paper, lifting off the scraps, then sliding the paper directly onto a baking sheet.

Frosting

One popular frosting for sugar cookies is a simple glaze of confectioners' sugar and either milk or fruit juice. By adjusting the ratio of liquid to sugar, you can make this glaze as thick or as thin as you'd like. Royal icing is another option: it dries to a hard, crunchy finish and also holds up well in the mail. Buttercream frosting is soft and thick; tasty, but not good if you plan to stack the cookies. Instead of frosting, you can also dip half or all of a cookie in chocolate and then in chopped nuts or crushed candy canes.

Other Decorating Ideas

Instead of frosting, you can decorate the cookies before you bake them! Sprinkle on coarse colored sugar, nuts, colored sprinkles, silver dragees or other small candies. Alternatively, make colorful designs on the unbaked cookies by painting them with a mixture of egg yolks beaten together with food coloring. The finished cookie will be bright and glossy.

Mailing

When making cut-out cookies for mailing, choose fairly sturdy shapes without too many small protrusions. Pack decorated, dry cookies in a flat, sturdy container with a tight-fitting lid. Lay down a selection of cookie shapes in a single layer, fitting them together as closely as possible. Now pile more cookies into the container, stacking same-shape cookies on top of each other. When the container is full, put wadded-up pieces of wax paper or unbuttered popcorn into any empty spaces, then seal the lid. Wrap the container in bubble wrap, then pack it into a box that is further padded with foam peanuts. The cookies should arrive fresh and beautiful and full of home-baked love.